
Last month I pulled a screenshot off a client's Windows laptop to drop into a presentation, and PowerPoint refused to insert it. The file icon looked like a normal photo. The extension said .jfif. I'd built and shipped an entire JFIF to PNG converter months earlier, and I still had to stop and think for a second about why this kept happening to people. That gap between "I built the fix" and "I forgot the cause" is exactly why this article exists.
If you've searched for this, chances are one of two things happened. Either you saved an image from the web on a Windows PC and got a .jfif file instead of the .jpg you expected, or a program on your phone or laptop is refusing to open, upload, or print a photo because of that same three-letter extension. Both problems have the same fix, and it takes less time to solve than it took you to search for it.
What a JFIF file actually is
JFIF stands for JPEG File Interchange Format. Despite the unfamiliar name, it isn't a different or lesser image format — it's the standard container format that JPEG images have used since the 1990s. Every .jpg you've ever opened is technically a JFIF file underneath. The image data, the compression, the colours — all identical to a regular JPEG.
The confusion comes entirely from the file extension, not the file itself. When you right-click and save certain images from Chrome or Edge on Windows, the operating system sometimes labels the file .jfif instead of .jpg, even though nothing about the actual picture has changed. Some apps, photo printers, and older editing tools only recognise the .jpg or .jpeg extension by name and reject anything else, which is where the frustration starts.
Why does Windows do this in the first place?
This one catches almost everyone off guard. Windows started defaulting to the .jfif extension for certain saved images a few Windows 10 and 11 updates ago, largely tied to how Chromium-based browsers handle image MIME types during a right-click save. It isn't a bug exactly, and it isn't something most users can toggle off from a simple settings menu. It's just an extension mismatch baked into how the browser and OS agree on file naming.
I've seen this trip up freelance designers who get client photos over email, small business owners uploading product images to Shopify, and students trying to submit assignments with embedded screenshots. In every case, the photo itself was completely fine. The only problem was a piece of software somewhere in the chain checking a file extension instead of the actual image data.
JFIF vs PNG: what's actually different
Here's where people mix up two separate questions: "why is my file called .jfif" and "should I convert it to PNG." They're related but not the same thing.
- JFIF (and JPG) uses lossy compression. Files are smaller, but repeated saving and editing can introduce visible compression artefacts, especially around sharp edges and text.
- PNG is a lossless format. Nothing is thrown away during compression, and it supports transparency, which JPEG-based formats never do.
So converting doesn't just fix a naming mismatch — it can genuinely improve the outcome if you're heading into design software, need a transparent background later, or are archiving something you don't want to degrade over time. If you only need the picture to open normally in an app that's fussy about extensions, a straight rename would technically work too, but that keeps the JPEG compression intact and does nothing for transparency or editing quality. Converting to PNG solves both problems at once.
How to convert JFIF to PNG (the way I actually do it)
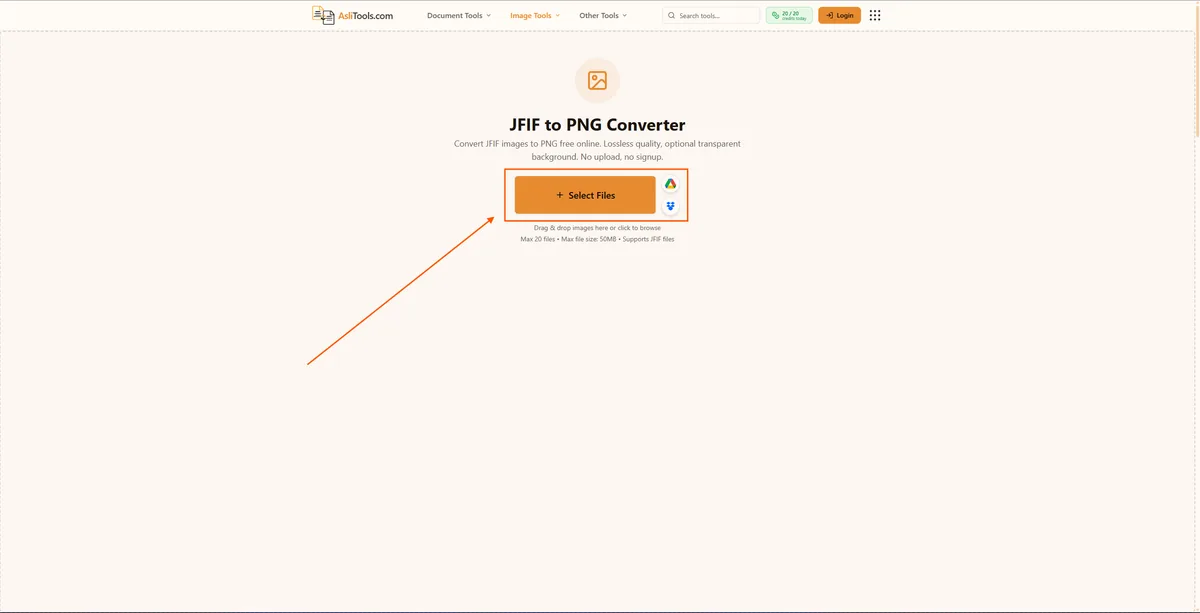
When this happens to me on a client project, I don't want to install anything, and I definitely don't want to upload someone else's photos to a random server. That's the exact reason I built the JFIF to PNG converter the way I did — everything happens inside your own browser tab.
Step 1 — Add your file. Drag the .jfif file onto the upload box, or click to browse. If you've got a whole folder of them from a client or a course download, you can add up to 20 at once instead of doing them one by one.
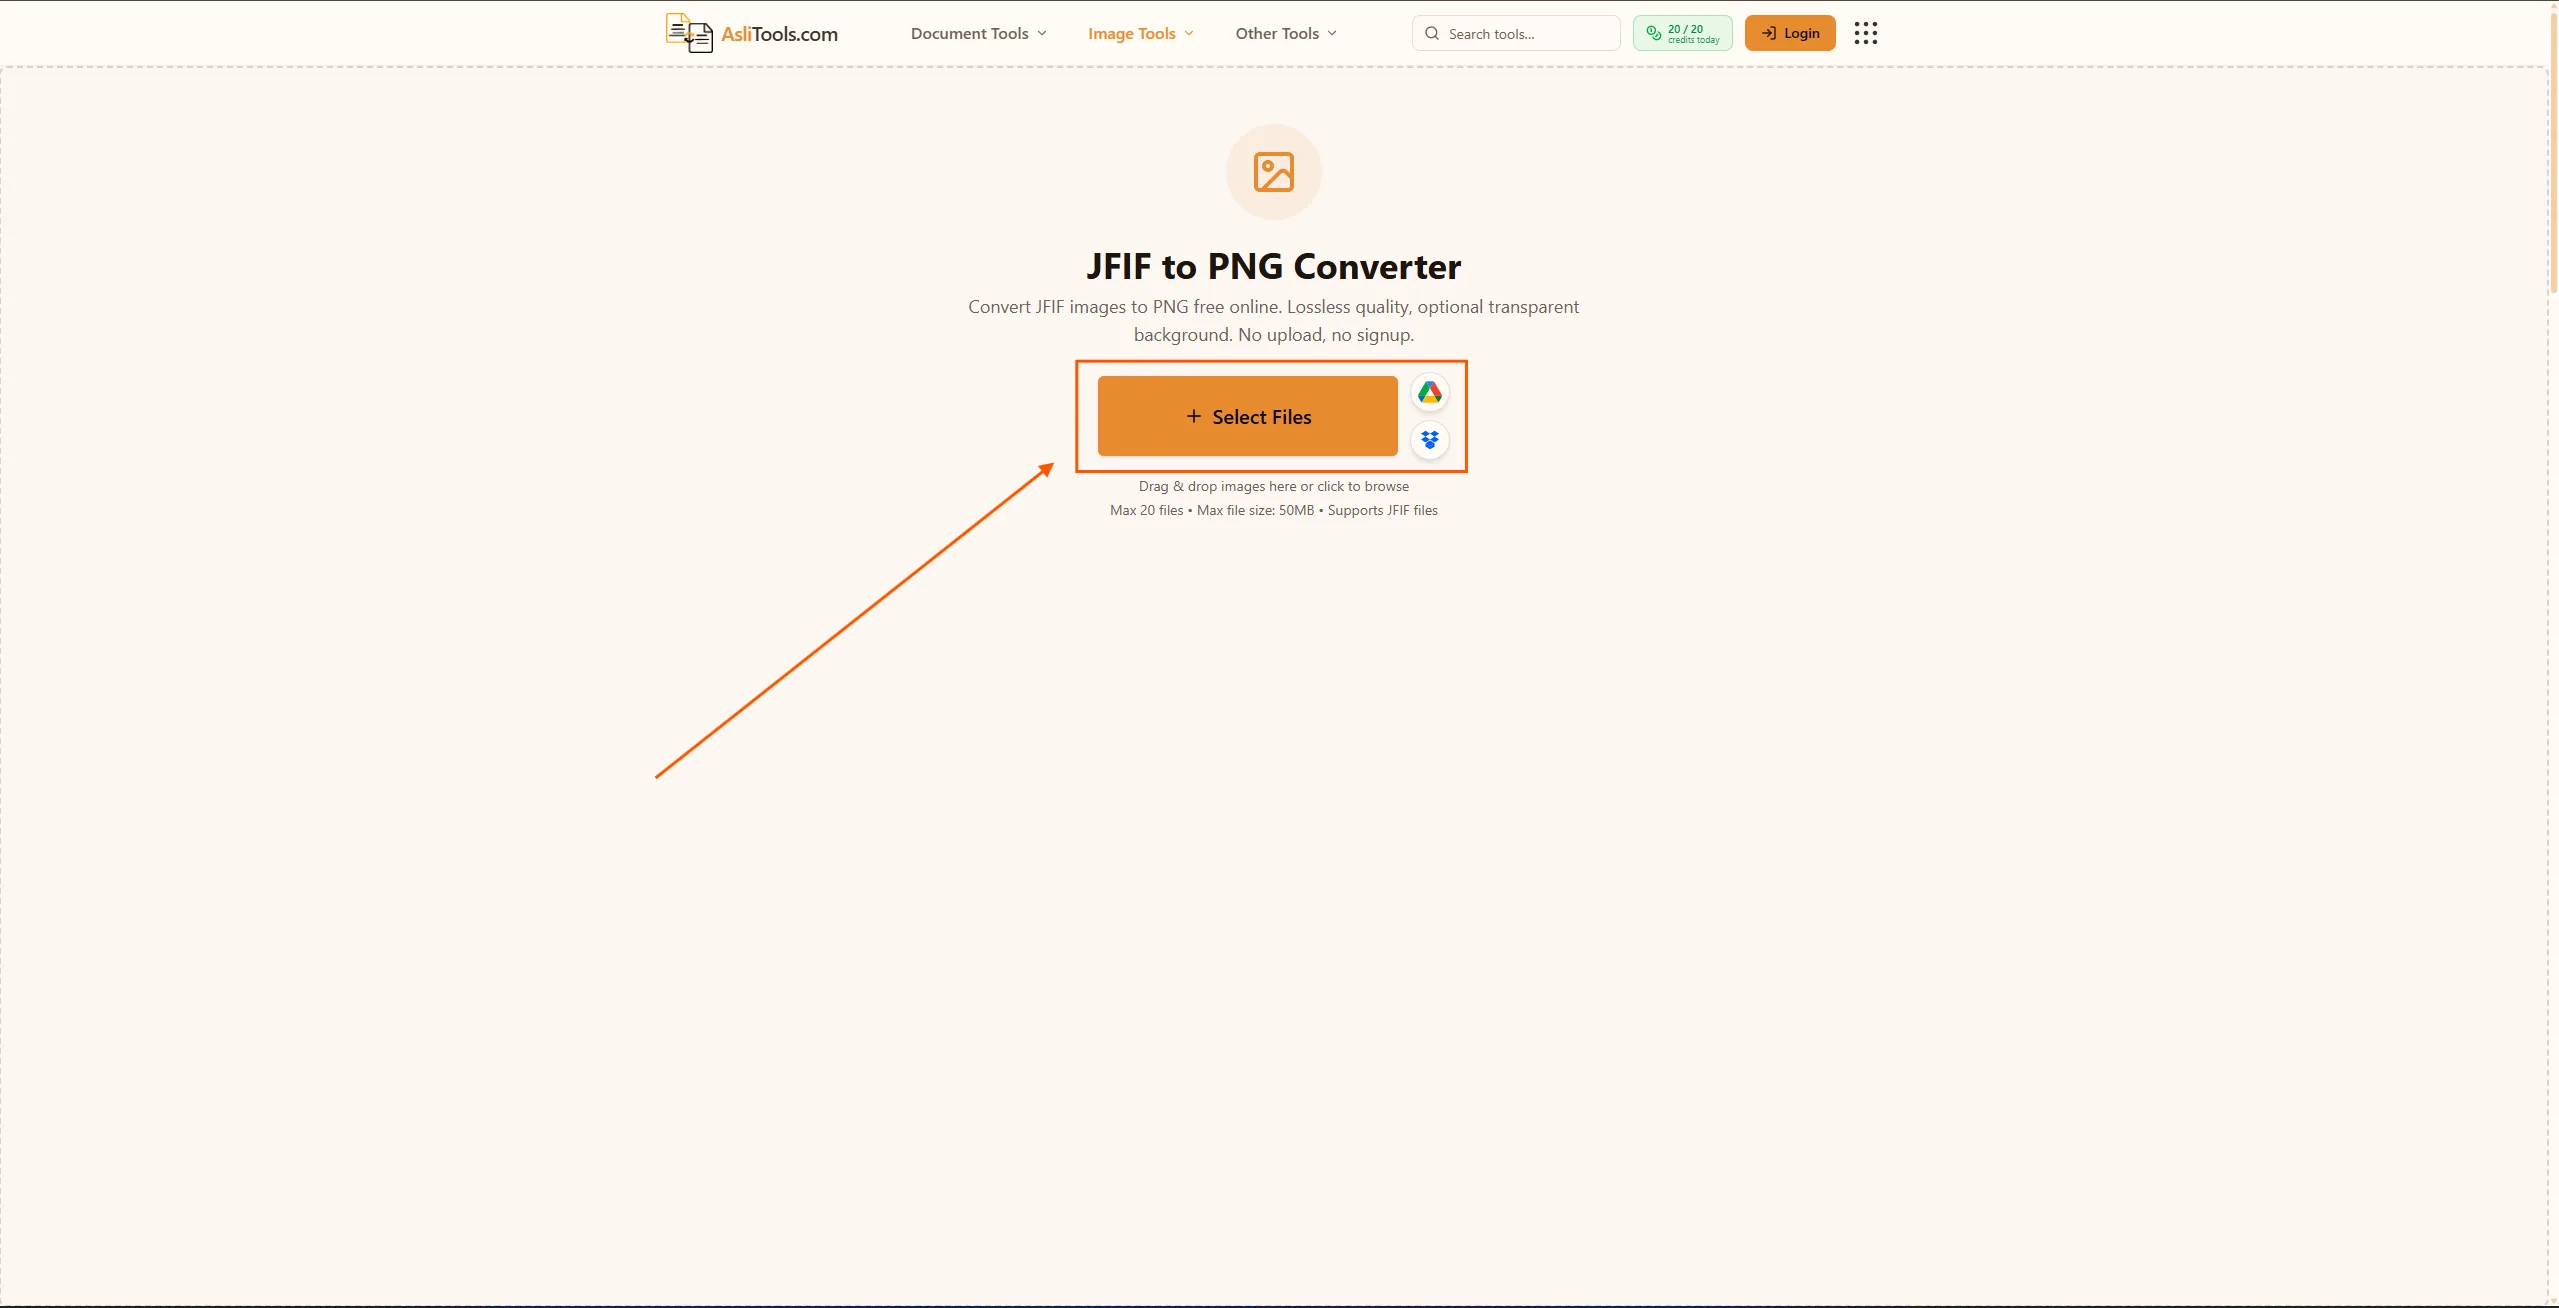
Step 2 — Let it convert. The tool decodes the JPEG data and re-encodes it as a proper PNG right there in your browser. Nothing gets sent anywhere, which matters if the photos are private, unreleased product shots, or anything under an NDA.
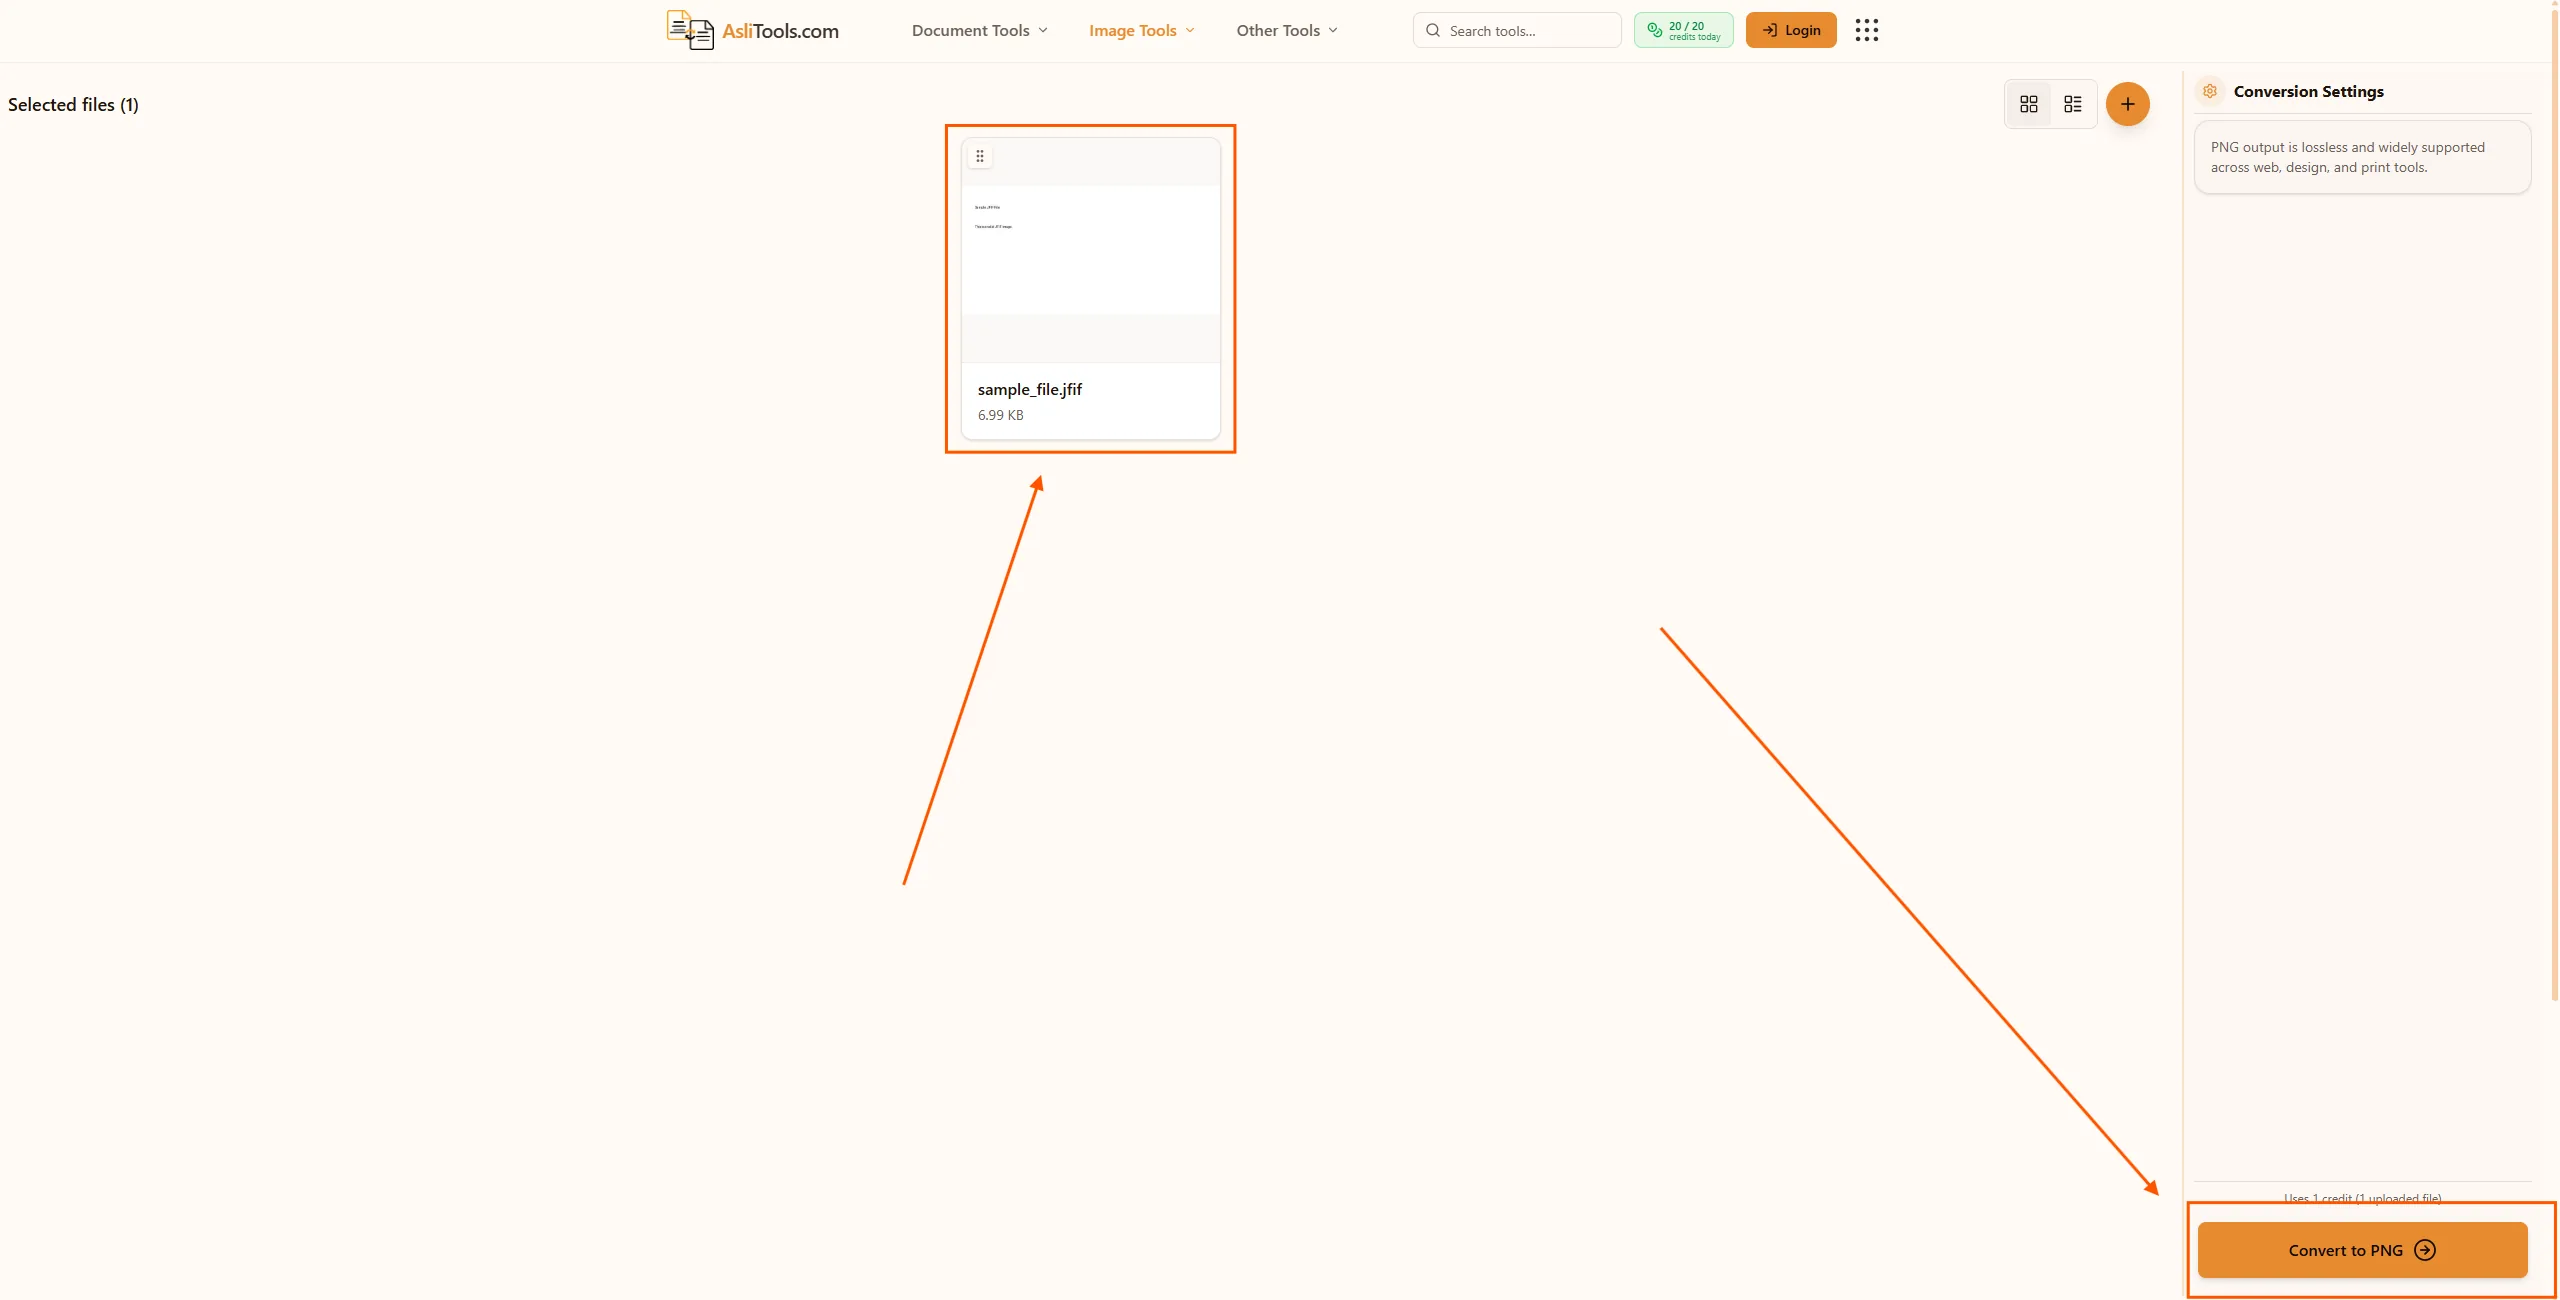
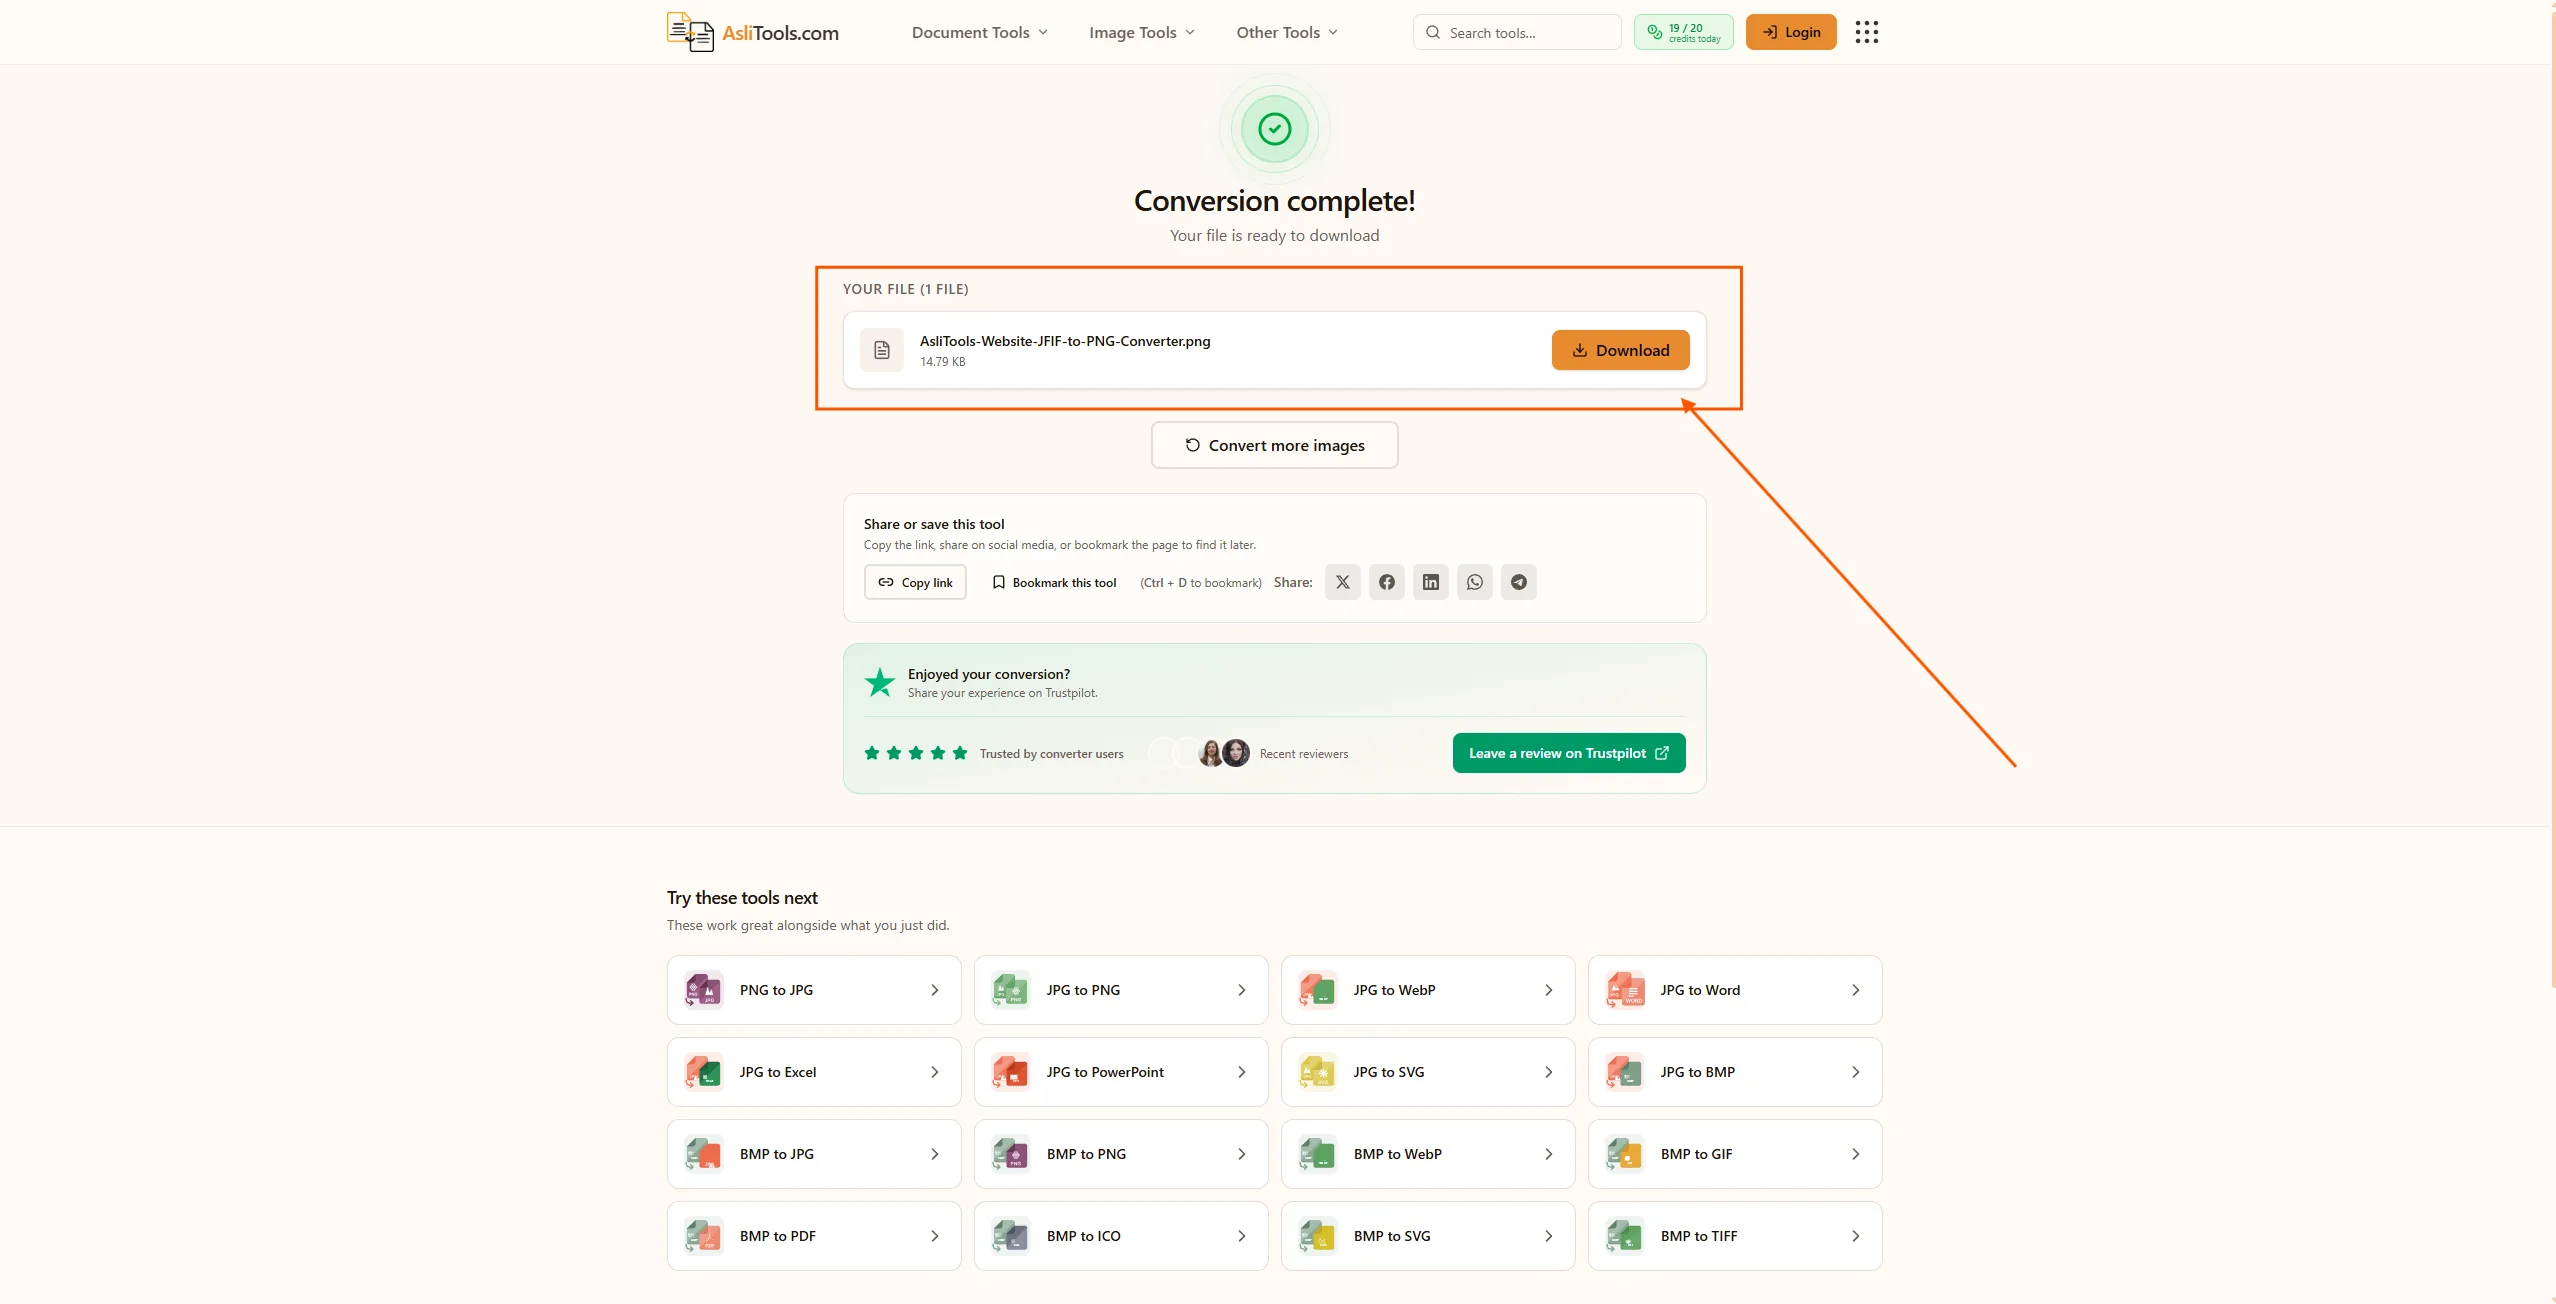
Step 3 — Download. Grab each file individually, or use "Download all" to get a single ZIP if you converted a batch.
One thing worth knowing before you convert: JFIF and JPG files don't store any transparency information, so the resulting PNG will still have a solid background — converting the format doesn't add transparency by itself. If you need an actually transparent background, that's a separate background-removal step after the conversion, not part of it.
When you actually need to make this conversion
Not every JFIF file needs converting. If a photo opens fine everywhere you need it to, leave it alone — there's no benefit to converting something that already works. Convert when:
- A website, printer, or piece of software rejects
.jfifspecifically and only accepts.jpgor.png. - You're moving the image into design software that handles PNG more predictably.
- You want to preserve quality for archiving instead of re-saving a JPEG repeatedly.
- You're preparing a logo, screenshot, or graphic where a future transparent background is likely.
- You're batch-processing a folder of screenshots or downloads before backing them up.
Related tools
If you're cleaning up a batch of mixed image formats, these tend to come up in the same workflow:
- JPG to WebP — for smaller files when you're publishing to the web.
- PNG to WebP — same idea, starting from PNG.
- JPG to SVG — useful if the image is a logo or icon you want as a scalable vector.
- JPG to Word — if the "photo" is actually a scanned document and you need editable text out of it.
All of these run the same way as the JFIF to PNG converter — free, in your browser, with nothing uploaded to a server.
Related tools on Asli Tools: JFIF to PNG, PNG to JPG, JPG to PNG, JPG to WebP, and PNG to WebP.