
A client once sent me forty event photos at eleven at night and asked for a slide deck by nine the next morning. No captions, no order, just a folder named "IMG_final_final2." I could have opened PowerPoint and dragged each photo onto its own slide one at a time, but that's an hour of clicking for something that should take five minutes. This is the exact problem a JPG to PPT converter solves, and after doing this kind of conversion for clients more times than I can count, I've picked up a few things that make the difference between a deck that looks thrown together and one that looks intentional.
Why photos end up needing to become slides
It's rarely about "making a presentation" in the traditional sense. Most of the time, someone already has the visual content — photos, screenshots, scanned pages, design mockups — and just needs it in a format they can present, email, or hand off. A few situations come up again and again:
- A photographer or event organizer needs to share a gallery as a slideshow instead of a zip file.
- A teacher has scanned worksheet pages and wants to walk a class through them one at a time.
- A support team has a stack of screenshots documenting a bug and needs to present them to a client.
- A small business wants to turn product photos into a lookbook-style deck for a pitch.
- Someone is archiving old photographs and wants a format that opens on any laptop without extra software.
In every one of these, the images already exist. The job is just packaging, not designing.
The actual steps (and where people lose time)
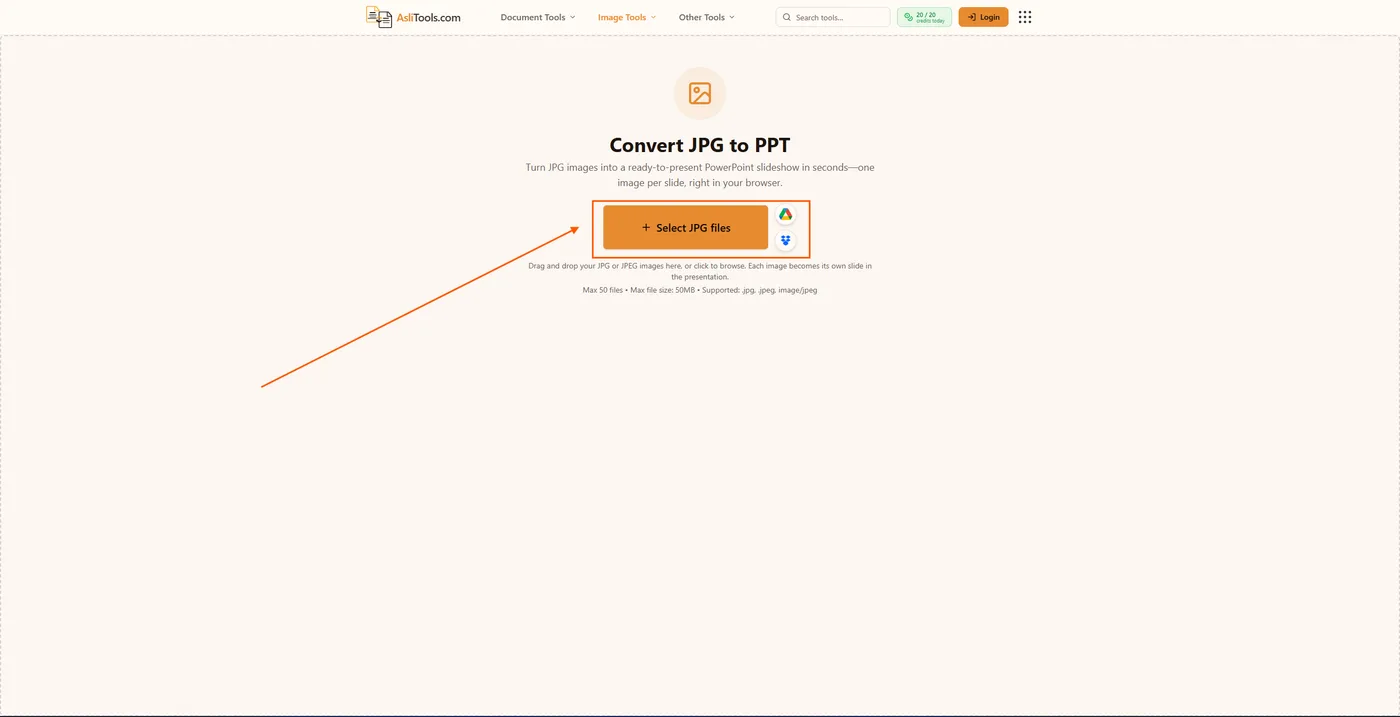
Converting JPG images to PPT is simple in theory: upload, order, download. The JPG to PPT tool handles this directly in the browser, so there's nothing to install and nothing gets uploaded to a server for processing. Here's how it plays out in practice:
1. Get your file order right before you upload. This is the step people skip, and it's the one that causes the most rework. If your images are named photo1.jpg, photo2.jpg, and so on, the order stays predictable. If they're named IMG_2049.jpg, Screenshot 2026-06-11.jpg, and final (2).jpg, you're going to end up reordering slides after conversion. Renaming files with a simple number prefix — 01_, 02_, 03_ — takes two minutes in file explorer and saves you from dragging slides around later.
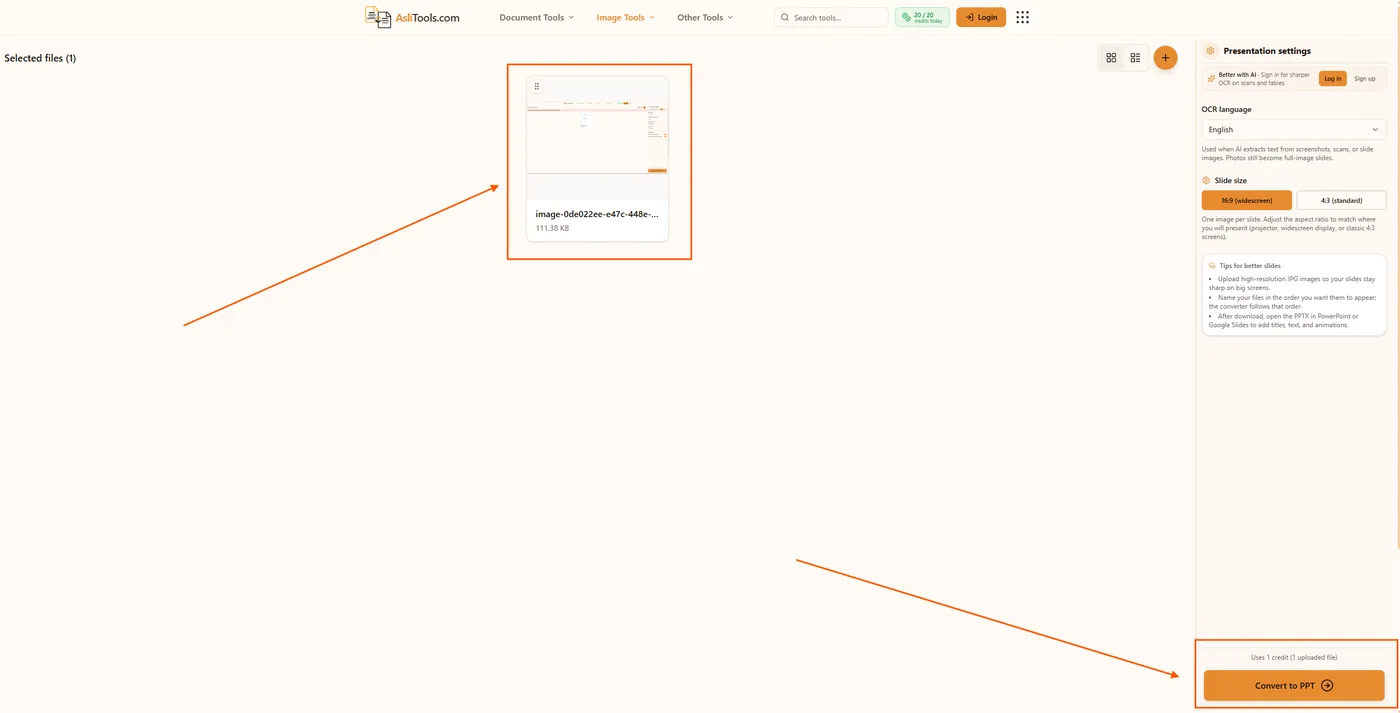
2. Pick the slide size before you convert, not after. Widescreen (16:9) is the right call for anything shown on a modern monitor, TV, or projector — it's what most screens default to now. Standard (4:3) still shows up in older projectors and some printed handout formats. If you're not sure which one your audience will use, 16:9 is the safer default in 2026.
3. Check resolution before, not after. This is the mistake I see most: someone uploads a photo that was already compressed for a website or WhatsApp, and it looks fine on a phone screen but pixelates the moment it's projected onto a wall. If an image looks slightly soft on your own screen at full size, it will look worse blown up on a projector. Use the original photo file, not a version that's already been shrunk for messaging apps.
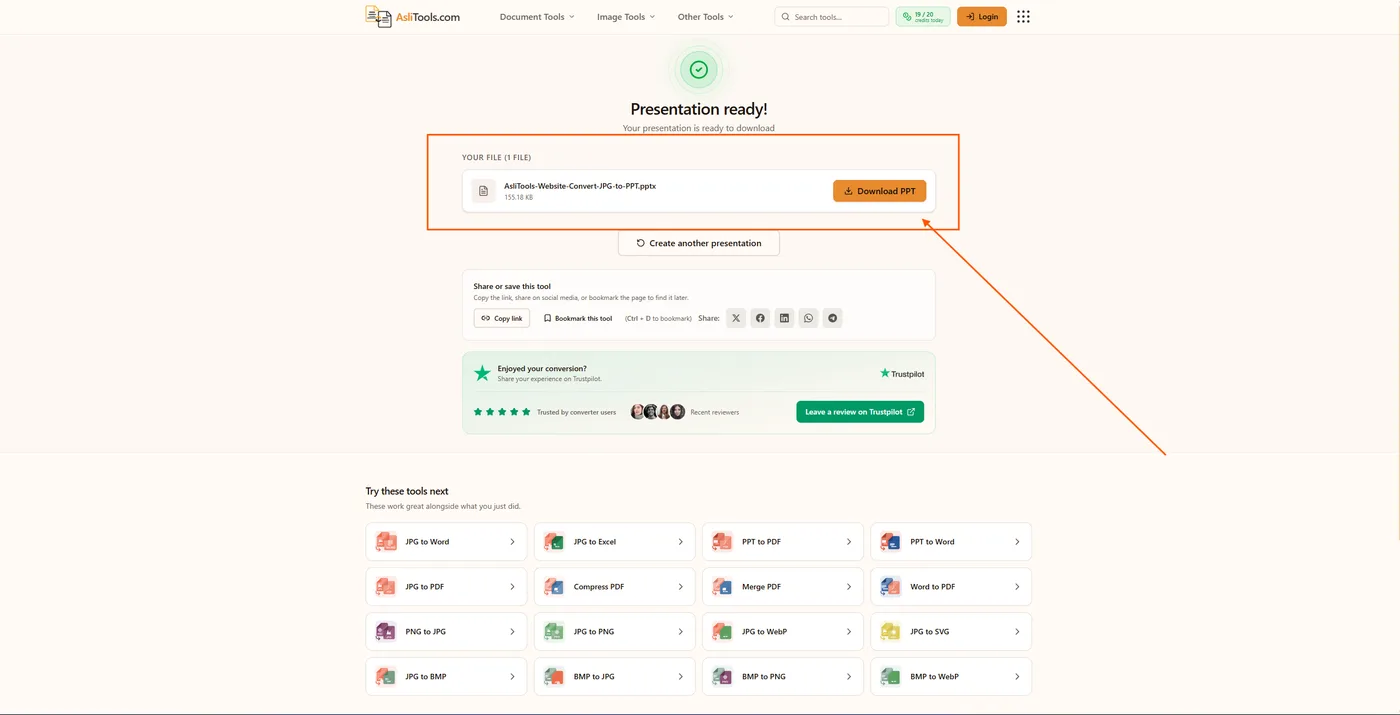
4. Convert and check the deck before sending it. Open the downloaded file once before you send it anywhere. It takes thirty seconds and catches the one slide that's rotated sideways or the one image that didn't upload.
Photo slideshow vs. AI-generated deck: pick based on what you actually need
A few tools on the market now generate an entire designed presentation from images using AI — adding layouts, backgrounds, and text suggestions automatically. That's genuinely useful when you're starting from nothing and want a designed look. But it's the wrong tool when your images are the content, not raw material for a designer to reinterpret.
If you have finished photos, screenshots, or scans and you want each one to appear exactly as it is, one image per slide, a straightforward converter does the job faster and without the AI reformatting your images or cropping them into a template. Save the AI design tools for when you're building a deck from scratch and need help with layout, not when you already have the visuals ready to go.
What to do with the deck after conversion
Once your PPTX file is ready, a few common next steps:
- Adding captions or titles: Open the file in PowerPoint or Google Slides and add a text box per slide. The conversion gives you the visual layer; text is quicker to add afterward than to bake in beforehand.
- Sharing it as a PDF instead: If your recipient doesn't have PowerPoint or you just want a version that can't be edited, run the finished deck through a PPT to PDF converter before sending.
- Extracting text from scanned images first: If your JPGs are actually scanned documents with text you need to reuse — not just display — convert them with a JPG to Word tool first so the text becomes editable, then decide whether you still need the slide version.
- Fixing image format issues: Some cameras and phones still save photos as HEIC or PNG. If your files won't upload because they're the wrong format, convert them to JPG first with a PNG to JPG converter, or go the other way with a JPG to PNG converter if you need transparency preserved for a different project.
- Reducing file size for email: If your photos are large and the resulting deck is too heavy to email, a JPG to WebP converter can shrink the images before you build the presentation, without a visible drop in quality on screen.
Putting it into practice
Converting a batch of photos into slides isn't complicated, but the small decisions — file naming, resolution, slide size — are what separate a deck someone has to fix versus one that's ready to present as-is. The JPG to PPT converter handles the packaging in your browser at no cost, and for related image and document conversions, the full tool library covers formats from JPG and PNG through PDF and Word.
Related tools on Asli Tools: PPT to PDF, JPG to Word, PNG to JPG, JPG to PNG, and JPG to WebP.